All it takes to grow peas is a little bit of space, seeds, and some know-how. The following 101 will guide you, thanks to input from two HOMEGROWN contributors: Matthew Riland, a Pennsylvania backyard gardener, and Paul Betz, a farmer with High Mowing Organic Seeds.
Matthew’s Guide to Growing Peas on a Small Scale
Think Backyards and Community Gardens…
Peas are one of the first crops you can plant in the early spring and are a sweet treasure that our family and friends love.
Varieties
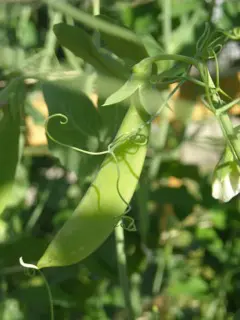
Photo © Matthew Ryland
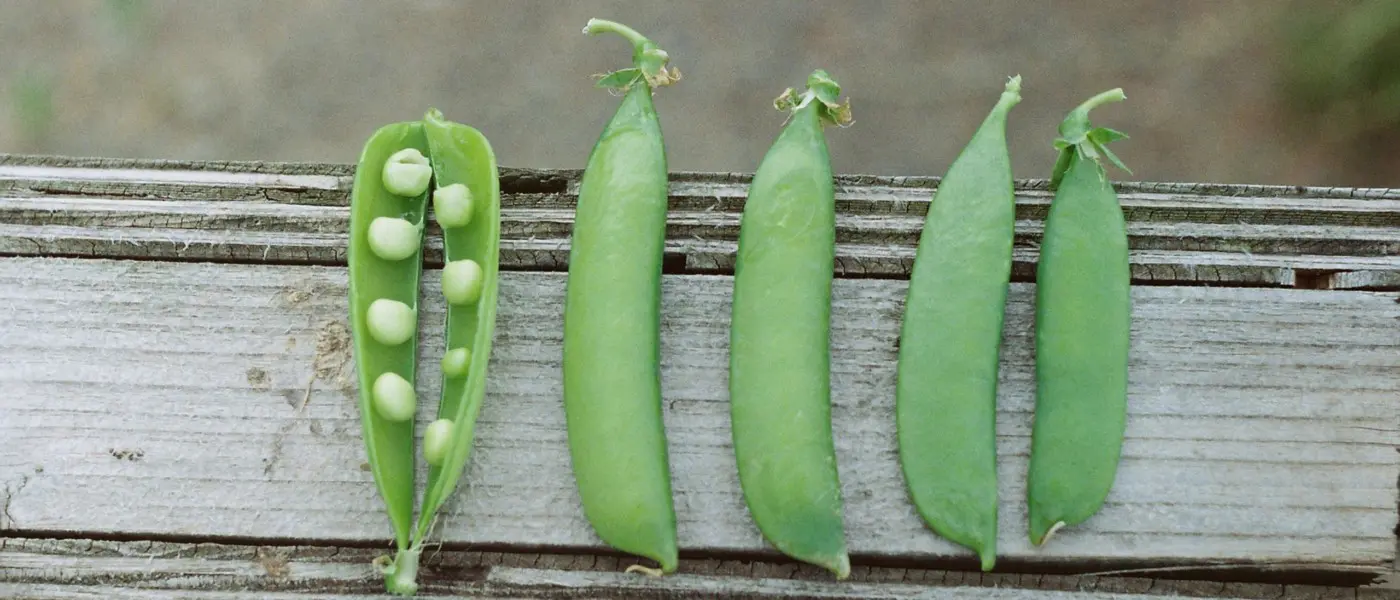
There are lots of different types of peas you can grow, including sugar snap peas, snow peas, and English shelling peas. Most pea plants will grow to a height of at least 3 feet, which means you’ll need some type of structure to support the plants. If you’re not interested in building a trellis, several seed companies offer compact or bush-style pea varieties. Some of these can even be grown in a pot.
For the last six years, I have been growing and saving the same heirloom variety of sugar snap pea. This variety grows to a height of about 6 feet and requires a substantial support structure. We prefer sugar snap peas to other peas because sugar snap peas have more body to them and don’t require shelling. The variety we grow is super sweet and a great addition to any meal.
Planting
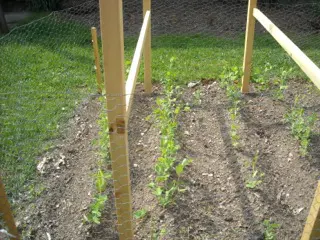
Photo © Matthew Ryland
Living in central Pennsylvania (zone 6b), I usually plant my peas right after St. Patrick’s Day, which is usually about six weeks before our last frost. I really try to pay attention to the weather during this time of year and adjust my planting accordingly. Sometimes it might be the end of March before I plant my peas. It just depends on the weather. (HOMEGROWN note: To determine your area’s first and last frost dates, check out this handy chart from The Old Farmer’s Almanac. You can always plant sugar snap peas later in the growing season, but any earlier than six weeks prior to your final frost date isn’t advised.)
For a successful crop, make sure you consult your seed packets or your seed catalog prior to planting. Also, make sure you have a good understanding of how high your peas will grow!
Peas require average garden soil, nothing special. I usually create a mound for the row, and then make a small groove in the mound, in which I place the pea seeds. I place the seeds about 1 inch apart down the length of the row. Once the row is planted, I use a rake and pull some soil up and over the seeds. You want your seeds to end up at a depth of about ½ to 1 inch below the surface. Once all of the rows are planted, I water each row.
I plant two rows 10 inches apart and place the trellis in between them. I leave about 2 feet between each pair of rows, which allows enough space for reaching in to pick the peas. For short rows (less than 4 feet), I would recommend at least 2 feet between your rows. If you have long rows (more than 4 feet), I would recommend leaving about 3 feet between your rows so you have plenty of space to walk and pick.
Trellising
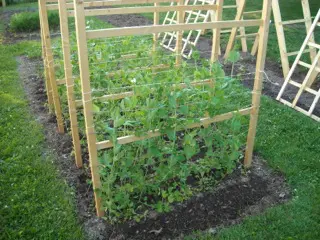
Photo © Matthew Ryland
One of the most important parts of growing peas is supporting them—something you want to give careful consideration before you even plant your seeds. If your peas are not supported well, the plants will fall over and your peas can be lost. There are many options when it comes to constructing a pea trellis; it really depends on your garden space and your budget.
When I first started growing peas, I would place a stake at either end of the short row and run binder twine between the stakes to support the plants. This worked most of the time, but towards the end of the season, when the plants were tall and full of peas, they would tend to fall over. As a result, I decided to build a wooden pea fence that could be reused year after year. The fence is a rigid structure that I can tie binder twine to, which holds the pea plants against the fence. You can get step-by-step directions for building a pea fence on my blog.
Maintenance
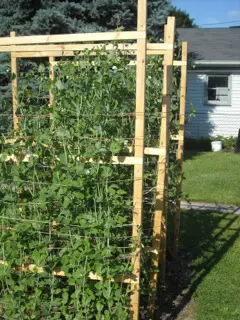
Photo © Matthew Ryland
Peas can require more maintenance than other types of vegetables, depending on your trellis. I usually have to tie my peas back weekly or biweekly once they really start to grow. This can take some time, depending on how many rows you have. Be very careful when securing your peas to a trellis, as to not break the tender young pea plants.
Once the peas have reached a height of 3 inches, I usually apply fish fertilizer to encourage growth. Once the peas have reached a height of about a foot or more, I side dress the plants with a homemade organic fertilizer.
I usually hoe between the rows once a week to remove any weeds; then I hand pick any weeds growing on the row mounds near the plants. It takes some time but it’s well worth it.
Harvesting
The variety of pea you choose will determine your harvest time. The sugar snap that I grow is ready to harvest within about 70 days. If we plant mid-March, we can usually expect to begin harvesting in early June; your harvest date will depend on your planting date and region. Peas can be harvested as soon as the pods begin to form, but you can benefit from letting the pods get a little larger, yielding sweeter, more flavorful peas—if you can wait, that is. My wife and children graze through the garden, eating the fresh peas right from the plants.
Paul’s Guide to Growing Peas on a Large Scale
Think Farms and Commercial Gardens…
It seems that everyone likes eating peas, but the planting and picking parts can be challenging. At my farm, we’ve decided that they’re an important part of our crop mix, so we have found ways to ease the burden and bring them to our markets week after week without too much stress.
Varieties
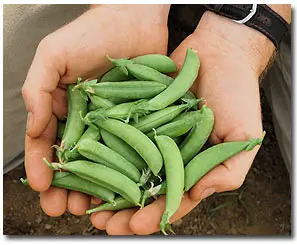
Photo © High Mowing Organic Seeds
I am really hooked on the Sugar Ann and Cascadia for snaps and the Green Arrow for shells. The Sugar Ann is really quick to harvest and will yield well over three to four pickings. The Cascadia is a later variety that tops out around 4 feet, so it’s easy to fence.
We focus on snap peas for our markets since we find that the demand for them is higher than for shell peas. In order to try to have them available every week, I plant numerous successions in the spring, as soon as I can get them in.
Planting
For the planting layout, we use a 4-foot bed width. I can fit either two rows of the Sugar Ann or one row of the Cascadia per bed. I run a band of seeds down each side of where the fence will be set, giving me a double row. On the first day, I plant both Sugar Ann and Cascadia. Then, in a few weeks, I plant both varieties again. Then one week later I plant a last shot of the Sugar Ann. The plan is for the three plantings of Sugar Ann to lead into the Cascadia.
Trellising
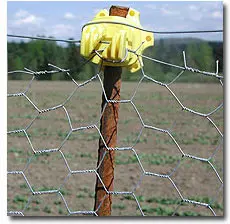
Photo © High Mowing Organic Seeds
Lots of the problems around picking can be solved by trellising. We trellis all of our peas, even when they top out at only 2 feet. The initial expense is fairly modest, and the labor of putting up a trellis is fairly quick. We have been using the same fences for close to 12 years now, and they’re still in good shape. We build our trellises to two different heights, a 2 foot and a 4 foot, using 2-inch chicken fence.
We use a 4-foot piece of ½-inch rebar for our posts on the shorter varieties. I can get 5 posts from a 20-foot length of rebar, so each one ends up costing only a few dollars. Two round-post electric fence insulators securely hold the fence. I space them about every 12 feet. I have been using 6-foot studded T Posts for the 4-foot varieties. Although they cost more than wooden posts, they don’t rot, are much sturdier, are easier to drive into the ground, and are easy to hang the fence on. They are usually on sale in the spring. I use 3 clip-on electric fence insulators per post and space them every 8 to 10 feet in the row, since the weight of the pea vines can get heavy.
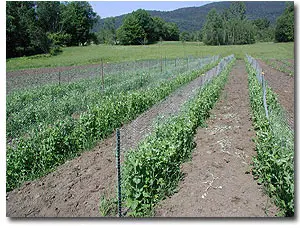
Photo © High Mowing Organic Seeds
Here’s a cost breakdown for a 100-foot row of 2-foot trellising:
- posts and insulators, about $40
- fencing, about $30
- less than half an hour of labor, assuming a rate of $10/hour, $5
Total: $75
Assuming you would be getting 15 pounds of peas each picking, three pickings would give you 45 pounds of peas. At $4.50/pound, the value of the peas would be more than $200. The cost of the fence is then absorbed in the first year.
For a 100-foot row of 4-foot trellising:
- posts and insulators, about $70
- fencing, about $45
- less than one hour of labor at $10/hour, about $10
Total: $125
Given a harvest over three to four pickings of 100 pounds, at $4.50 per pound, the value of the peas would be $450. Again, the up-front costs are absorbed in the first season. Take care of the fence and use it for the next 15 years, and you can see the payoff of the initial expense.
Maintenance
I am often picking the last round of the Sugar Ann when the Cascadia come on, but I don’t mind having some overlap. Once the peas are up, I weed them really well and install the fence when they are about 2 to 3 inches in height. Wait too long, and it’s really hard to get the fence in between the two rows.
Harvesting
I’m often picking peas into the waning days of August, and my markets are happy to have them. A little extra work in the spring can go a long way, and I get a great breakfast snack whenever I walk by the patch.
More on Growing Peas
- Mother Earth News includes info on optimum growing conditions and soil pH.
- And Gardener’s Path includes info on dwarf varieties, ideal for home growers with limited space.
- Videos on growing peas from seed, building a cheap and dirty growing frame, and building a trellis for peas and yard-long beans: