The following 101, on building a duck house, comes from HOMEGROWN contributor Lauren Klouda, the Ohio homesteader behind Honest Desires Farm. (For more information, check out her Raising Ducks 101.) Thanks so much, Lauren, and please keep the good ideas hatching.
Building A Duck House 101
Chickens have been in the limelight for quite a while now, and even our non-homesteading friends have tossed around the idea of “pet” chickens. Who wouldn’t give at least a brief consideration to having fresh eggs straight from the backyard?
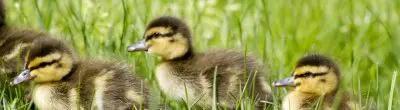
But what about that other fowl friend: the adorable quacking duck? It’s high time ducks enjoyed a renaissance all their own. The cute factor is off the charts, and having some fluffy adorableness to call your own is nearly irresistible.
If you are a well-prepared homesteader, you will have read every book on ducks and pored over every resource you can find online. Or you could jump right in when your husband brings home three adorable Cayuga ducklings when he was supposed to be buying chicken feed. Of course, that would never happen to you, right?
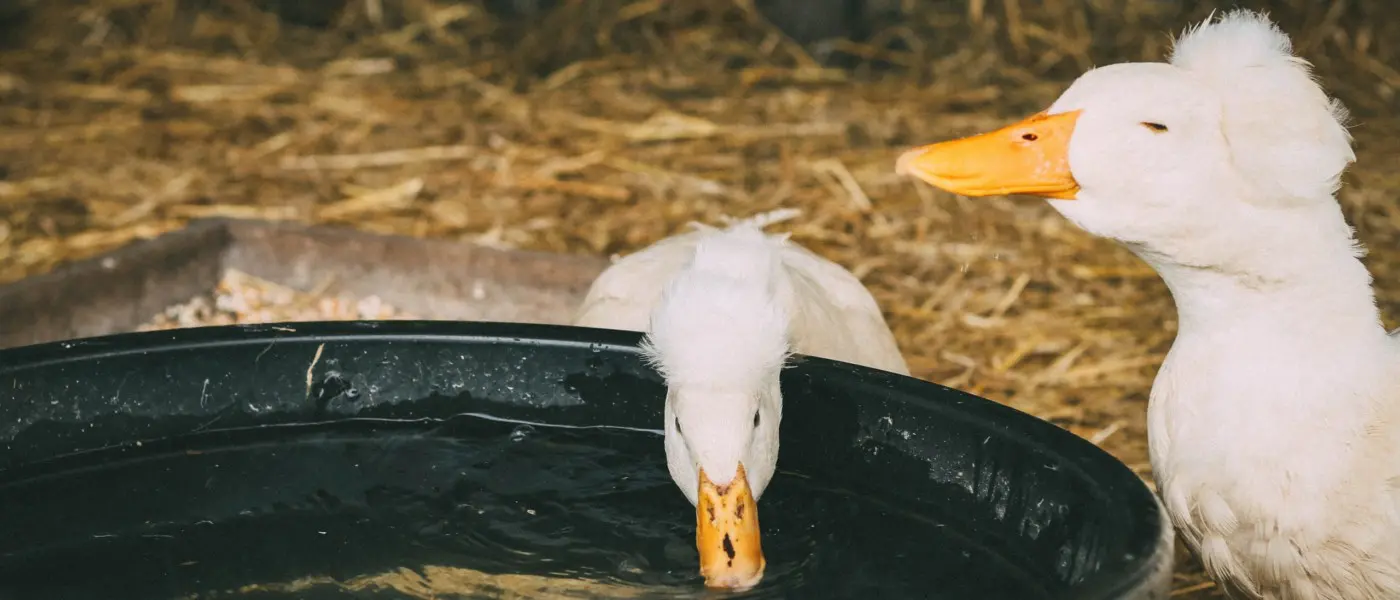
Let’s say, one way or the other, you end up with ducklings. Where will you keep them when they’re grown up? Never fear. We built an adorable, sturdy duck house with materials we had on hand, and you can, too.
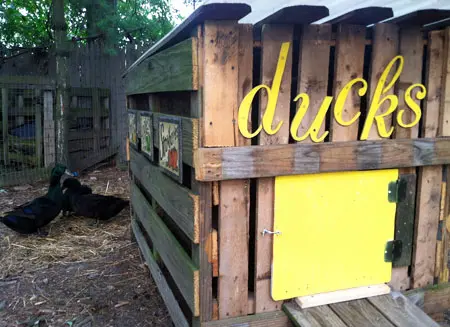
Photo © Lauren Klouda
Step 1: Look for Inspiration
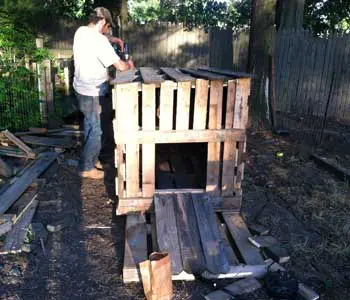
Photo © Lauren Klouda
As with a chicken coop, you can spend as much or as little as you want on a duck house. In this stage of planning, I researched all the lovely ideas I could dream of, envisioning something straight out of the pages of Country Living. What I got was even better, though, because it was free—and charming in a rustic, functional way. Knowing what you need and what you want helps keep your project on track.
Step 2: Determine Your Criteria
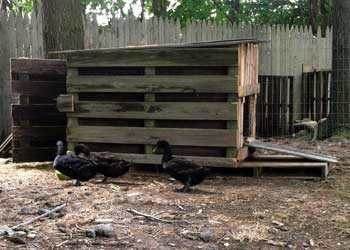
Photo © Lauren Klouda
For example, my requirements for a duck house included:
- Easy to clean
- Movable
- Cheap or free
- Cute
- Easy to clean (So, so, so important. The smell of messy, wet duck poop is something horrible.)
Step 3: Identify Materials

Photo © Lauren Klouda
There are no professional carpentry skills required, unless you’re a perfectionist. (But from one recovering perfectionist to another: Leave it at the door.) Imperfections can be fun, and trust me, as long as the house is safe, your ducks won’t care if it’s immaculate. We used materials we had on hand. Even if you need to buy some things, your duck house should still be a fairly inexpensive project. What you’ll need:
- Reciprocating saw (or a similar wood saw)
- Drill (or a screwdriver plus elbow grease)
- Drywall screws (or nails, but screws hold better)
- Measuring tape (honestly, I don’t think we used one)
- Pallets (we used three)
- 8’x6’ shadow-box wood fence panels (2 ¼ total)
- Corrugated plastic (for the roof; tarpaper would work)
- Plywood (we reused a piece from a DIY garage cabinet door)
- Vinyl tile (for the duck house floor; we had some left over from a dog kennel project)
- Hinges, hooks, and/or locks
- Any trim or decor elements
Step 4: Locate Supplies for Cheap
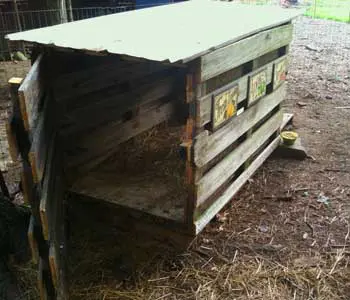
Photo © Lauren Klouda
We didn’t want to spend money on the duck house, so we looked around our half-acre homestead to see what we had on hand. Everyone knows that pallets are fairly easy to come by, but you may be able to score wood fencing for free, too. We did! One way is by stopping when you see someone getting a new fence installed. Speak with the work crew and see if you can’t pick up the old wood fence that’s getting replaced. We were able to get a large number of stockade panels that way.
You might also check with a local fence company. We stopped by one around the corner from us, and it turns out they have to pay to have old fencing disposed of. Of course, we made sure to give a thank-you gift to the owner. What’s the cost of a restaurant gift card in exchange for as much free wood fence as we could ever wish for? We’ve gotten both brand new fencing and old fencing in good condition that way. The wood can be used in a number of projects; you just have to be willing to pull the old fence panels apart.
For the roofing, we had one piece left over from previous projects—some corrugated plastic that we got for free and have used on our chicken coop, rabbit barn, shed, greenhouse, and now duck house. We also were given a roll of tarpaper left over from a friend’s side job.
In other words, be open to other people’s trash and unusable items. Scour Craig’s List, of course, but don’t be afraid to stop and ask. There’s a fine line between useless and unsightly trash and useful materials such as wood, metal, et cetera. All other materials and tools we had on hand because we use them often.
Step 5: Build Your Duck House
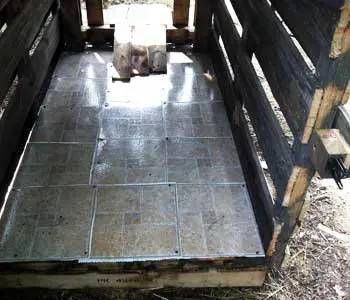
Photo © Lauren Klouda
Since we built our house from cast-off materials, I don’t have step-by-step instructions to share here. It was really a matter of taking what we had and making it all fit together. But for a rough blueprint, we took one of the 8’x6’ shadow box fence panels, cut it in half, and turned it sideways. We used those two pieces for the right and left sides of the house. Another fence piece made up the top, with the corrugated plastic covering it. There’s a slight overhang, as you can see in the pictures, making a sort of porch.
We used two pallets as a platform to keep the house off the ground—and movable. The front wall is a pallet that we cut to allow a ramp inside and out and a duck door. The entire back of the house is one-quarter of a shadow box fence panel on hinges. It swings entirely open to allow for easy access and cleaning. There’s a simple gate lock to keep it closed. We built the ramps out of miscellaneous fence boards. The pieces fit together like a puzzle, with a minimum of cutting.
Step 6: Plane Improvements
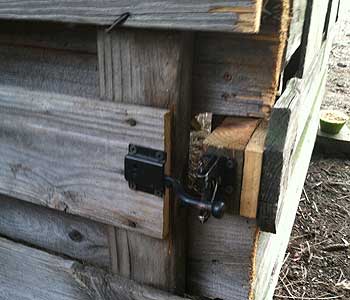
Photo © Lauren Klouda
If, like us, you build your duck house from materials you have lying around, there’s a good chance you’ll want to make upgrades at some point. For one thing, I would like to add a way to feed and water the ducks without a mess while they’re inside the house. I’m thinking about how to do that and have a few ideas. We’ll see what we come up with.
You’ll want to think about weather considerations, too. During the winter, we line the inside of our chicken coop with contractor plastic. We’ll do the same for the duck house, in order to prevent any biting winds from making the ducks sick or uncomfortable. We reuse this plastic over and over again, so it’s extremely economical.
I currently muck out the house with a plastic rake, but I think a metal garden rake would do a better job. For a thorough cleaning, I use a hose and bleach. We’re planning on redoing the floor to get rid of the tile overlap, which allows for some dirt and waste accumulation, and we’ll drill holes in the front corners of the house to allow for better drainage when we’re hosing it out.
Remember that you can always build in stages. Once your animals are safe, secure, and sheltered from the wind and rain, you can add extras. Personally, we’ve never been satisfied with our first time around on anything, be it a fence, a coop, or a rabbit hutch. But since our projects are so budget friendly, we can make changes as needed. Each year we improve, tweak, or rebuild as we learn and grow and as our needs change. I imagine it will be the same with our ducks!
Step 7: Decorate
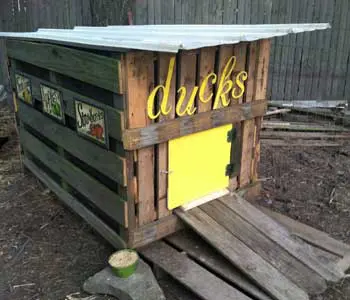
Photo © Lauren Klouda
You’ve gone to the trouble of building your ducks a comfortable home. Why not make it attractive? For the DIY duck lettering seen in this photo, you’ll need:
- Spray paint
- Scissors or an X-Acto knife
- Scroll saw
- Scrap wood
- PDF files for tracing or stenciling
If you don’t have a scroll saw, you can always cut out the letters and use them as a stencil. Best wishes for a happy duck home!